

Baby chicks arrive small, loud and completely dependent on you for warmth. A brooder is the safe warm box that stands in for a mother hen for the first few weeks, and setting it up right before the chicks arrive is the single best thing you can do for them. The whole job is simple once you know the numbers. Start at 95F in week 1, drop 5F a week until you reach about 70F, give each chick half a square foot to start, use pine shavings for bedding, and preheat the brooder a full 24 hours before the chicks arrive. This guide covers the whole setup, the temperature chart, heat lamp versus heat plate, brooder size, bedding, food and water, and the mistakes to avoid.
Table of Contents
- The Short Answer. Set It Up Before the Chicks Arrive
- What a Brooder Is and What Chicks Need in the First Weeks
- The Chick Brooder Temperature Chart, Week by Week
- Heat Lamp or Heat Plate for Chicks
- Brooder Box Size Per Chick and the Right Container
- What Bedding for Baby Chicks
- Food, Water and the First Week Routine
- Cleaning the Brooder and Keeping Chicks Healthy
- Common Brooder Mistakes to Avoid
- FAQs
Start at 95F in week 1 and drop 5F a week to about 70F. Give each chick half a square foot at first, rising to 1 to 2 square feet as they grow. Preheat the brooder 24 hours before the chicks arrive.
A heat plate is safer than a heat lamp, and a lamp must be clamped and guarded, never hung by its cord alone. Warm one end of the brooder only, so chicks can move away from the heat.
Use pine shavings for bedding, never newspaper or cedar. Chicks stay in the brooder until they are fully feathered, at about 6 to 8 weeks.
The Short Answer. Set It Up Before the Chicks Arrive
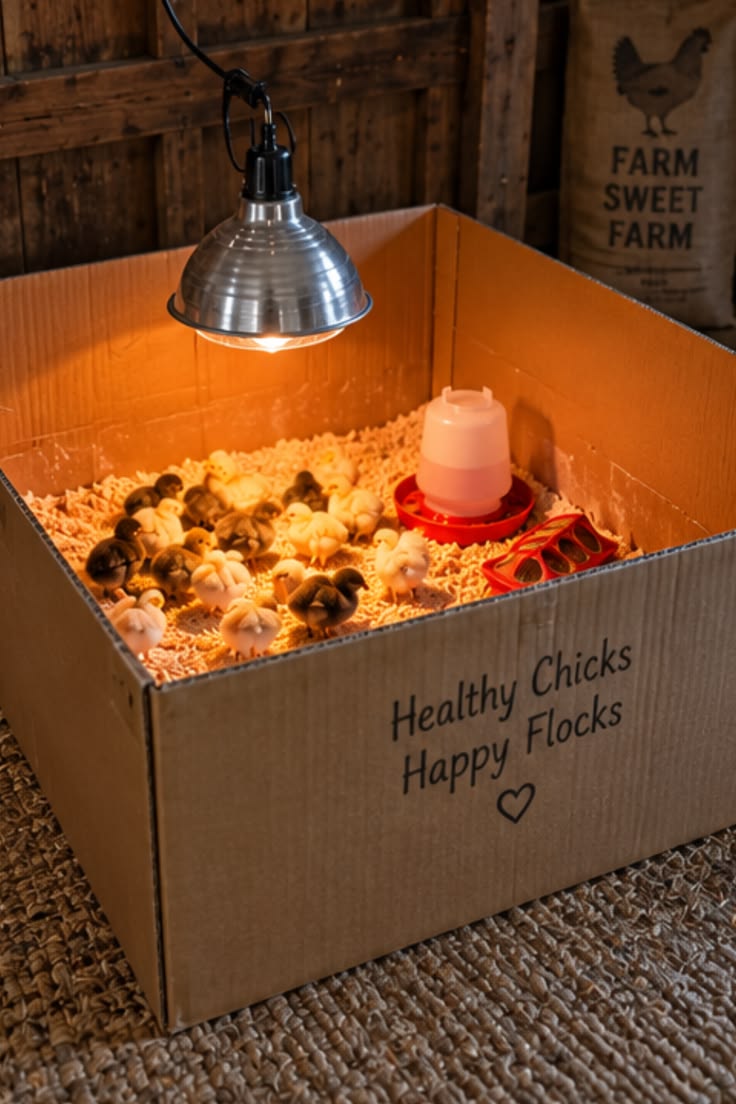
Set the brooder up and preheat it a full 24 hours before the chicks arrive. That one habit prevents most first day problems, because a cold brooder on arrival day is the fastest way to lose chicks. The short version of the setup is this. A large sturdy container with a lid or cover, a heat source at one end, pine shavings on the floor, a chick feeder and a chick waterer, and a thermometer at chick level. Start the heat at 95F in the first week and drop it by 5F each week until you reach about 70F. Give each chick half a square foot of floor space at first, and plan for more as they grow. Warm only one end of the brooder. Chicks need a warm zone under the heat and a cooler zone to move into, and they will tell you if the temperature is wrong by where they choose to sit. Chicks piled tight under the lamp are cold, and chicks pressed against the far wall are too hot. Chicks spread out and sleeping in loose groups are just right.
What a Brooder Is and What Chicks Need in the First Weeks
A brooder is a warm, draft free box that keeps baby chicks safe while they grow their first real feathers. In nature a mother hen does this job, and she keeps them warm under her wings and teaches them to eat and drink. Without a hen, the brooder has to do all of it. Newly hatched chicks cannot control their own body temperature. They chill fast and they overheat fast, which is why the brooder needs a warm end and a cool end, not one even temperature throughout. They also need constant access to chick starter feed and clean water, because they grow astonishingly fast in the first two weeks. The brooder also needs to keep them safe from drafts, from household pets, and from each other. Chicks peck at anything, including each other, when they are bored, crowded or too hot, so space and a calm setup matter as much as warmth. A brooder set up indoors, in a garage or a spare room, is the usual choice, and it should sit somewhere you will see the chicks several times a day.
The Chick Brooder Temperature Chart, Week by Week
The chick brooder temperature chart is the heart of this guide, so keep it where you can see it. Week 1 starts at 95F. Week 2 drops to 90F. Week 3 drops to 85F. Week 4 drops to 80F. Week 5 drops to 75F. Week 6 drops to 70F, and by then most chicks are feathered enough to manage room temperature. That 5F a week drop is the standard rule, and it works because chicks grow feathers fast. A chick at 3 weeks old has far more feather cover than a day old chick, so it needs less outside heat. Do not rush the drop, and do not hold the heat high for too long either, because chicks kept too warm grow slowly and feather late. Watch the chicks, not just the thermometer. The chart gives you the starting point, and the chicks tell you the truth. Chicks huddled in a tight pile under the heat source are cold, so raise the temperature or lower the lamp a little. Chicks spread flat against the far wall, panting or holding their wings away from their bodies, are too hot, so raise the lamp or lower the heat. Chicks moving freely between the warm end and the cool end, eating, drinking and napping in loose groups, are comfortable.
| Week | Temperature | What to expect |
|---|---|---|
| Week 1 | 95F | Chicks stay close to the heat, sleep a lot. |
| Week 2 | 90F | First wing feathers appear, chicks explore more. |
| Week 3 | 85F | Back and tail feathers coming in. |
| Week 4 | 80F | Chicks are active, dust bathing in the shavings. |
| Week 5 | 75F | Most of the body feathered. |
| Week 6 | 70F | Fully feathered, ready to start thinking about outside. |
Heat Lamp or Heat Plate for Chicks
Heat lamp or heat plate for chicks is the big equipment choice, and both can work. A heat plate is the safer and more natural option for most pet keepers, and a heat lamp is the cheaper and more common one. Choose with your eyes open about the fire risk. A heat plate is a flat heated panel on short legs that chicks duck under, just like they would duck under a mother hen. Chicks press their backs against the warm underside and come out to eat and drink. Plates use less electricity, they cannot set bedding on fire, and they let chicks follow a natural day and night rhythm, because the brooder goes dark at night. The downside is cost, and the fact that a plate only warms the chicks touching it, so it suits smaller groups best. A heat lamp is a bulb in a reflector hood, usually a 250 watt red or clear bulb, hung over one end of the brooder. It warms the whole warm end and it is cheap and easy to find. The danger is real, and it is fire. A lamp must be clamped securely to something solid and guarded so it cannot fall into the bedding, and it must never hang by its cord alone. Keep it well away from shavings and cardboard, and check the clamp every day. A lamp that falls into dry pine shavings can start a fire in minutes. Whichever you choose, warm one end only and leave the other end cool, and put the thermometer at chick level, not at the top of the brooder, because the temperature where the chicks actually sit is the one that matters.

Brooder Box Size Per Chick and the Right Container
Brooder box size per chick starts at half a square foot per chick in the first week, and it rises fast. By 4 weeks, plan on 1 square foot per chick, and by 6 to 8 weeks, plan on 1 to 2 square feet per chick. Chicks double in size in a few weeks, and a brooder that felt roomy on day one feels crowded by week 3. A large plastic storage tub works well for a small group of 4 to 6 chicks, and a big cardboard box works for a short stay, though cardboard soaks up spills and needs replacing. A stock tank, a large dog crate lined with cardboard, or a plywood box all work for bigger groups. Whatever you use, it must be sturdy, easy to clean, tall enough that chicks cannot hop out once they start testing their wings at 2 to 3 weeks, and ventilated enough that fresh air moves through. Cover the top with hardware cloth or wire mesh once the chicks start hopping, because a cover keeps chicks in and pets out while still letting air move, and never use a solid lid, because heat and moisture build up fast. Plan the upgrade before you need it. If you start with a tub, have the bigger box ready by week 3, because moving chicks into a roomier brooder is a ten minute job when the new box is ready, and a stressful scramble when it is not.
What Bedding for Baby Chicks
What bedding for baby chicks has a simple answer, and that answer is pine shavings. Spread them 2 to 3 inches deep over the brooder floor. Pine shavings are absorbent, soft under tiny feet, easy to find, and cheap enough to replace often. They also let chicks scratch and dust bathe, which is natural behaviour from the first weeks. Never use newspaper. It is slippery, and chicks raised on a slick floor can develop splayed legs, a condition where the legs slide out sideways and the chick cannot stand properly. Paper towels are fine for the first day or two, because they give good grip while chicks learn where the food is, but move on to shavings after that. Never use cedar shavings. Cedar gives off strong aromatic oils that irritate chick lungs and can cause breathing problems. Sand is sometimes suggested, and it works for older birds, but it is heavy, cold and hard to keep clean in a small brooder, so shavings are the better first choice. Whatever bedding you choose, keep it dry. Wet bedding breeds disease fast, and it chills chicks, so scoop out wet patches daily and replace the whole lot when it starts to smell.

Food, Water and the First Week Routine
Chicks need chick starter feed from day one. Chick starter is a fine crumble made for the first 8 weeks, with about 18 to 20 percent protein, and it is the only feed they need at this age. Put it in a shallow chick feeder they can reach easily, keep it full, and do not switch them to layer feed, because layer feed has too much calcium for young kidneys. Water matters even more than food in the first hours. Dip each chick’s beak gently in the waterer on arrival, so every chick learns where the water is. Use a chick waterer with a shallow base or add clean marbles or pebbles to the dish, so a chick that climbs in cannot drown. Change the water at least once a day, and more often if shavings get kicked into it. Our guide to baby chick treats covers what else chicks can eat, and when. In the first week, stick to starter feed and water, because treats fill tiny stomachs with food that lacks the protein chicks need to grow. From about 2 weeks, tiny amounts of finely chopped greens or a little scrambled egg are fine. Keep the routine calm and regular, and check the chicks morning and evening, topping up feed and water and scooping out wet bedding. A few minutes twice a day keeps a brooder healthy, and it also gets the chicks used to your hands.

Cleaning the Brooder and Keeping Chicks Healthy
A brooder gets dirty fast, because chicks eat, drink and poop in the same small space. Scoop out wet or soiled bedding every day, and do a full clean at least once a week. For a full clean, move the chicks to a spare box, tip out all the bedding, wipe the floor with a mild cleaner or warm soapy water, dry it well, and refill with fresh shavings. Watch for pasty butt, the most common chick problem. Droppings stick to the fluff around the vent and dry into a plug, and a chick that cannot pass droppings will die. Check every chick’s vent daily in the first two weeks. If you see a plug, soak it off gently with a warm damp cloth, never pull it dry, and dry the chick before putting it back under the heat. Healthy chicks are busy, bright eyed, eating and drinking, and sleeping in loose piles. A chick that stands alone with its eyes closed, hunched and puffed up, or that refuses food and water, needs attention at once. Separate a sick or weak chick into a small warm box of its own, so it can eat and drink without competition, and ask a vet if it does not improve in a day.
Common Brooder Mistakes to Avoid
The most common mistake is setting the brooder up after the chicks arrive. A brooder that is still cold when the box of chicks opens is a bad start, so preheat 24 hours ahead and test the thermometer at chick level first. The second mistake is heating the whole brooder evenly. Chicks need a warm end and a cool end, so always leave a cool zone. The third mistake is the wrong bedding. Newspaper causes splayed legs, and cedar shavings irritate lungs, so pine shavings are the safe default, with paper towels fine for the first day or two. The fourth mistake is a heat lamp hung by its cord, with no clamp and no guard. That is a fire waiting to happen, so clamp the lamp to something solid, guard the bulb, and check it daily. The fifth mistake is moving chicks outside too soon. The brooder is home until chicks are fully feathered at about 6 to 8 weeks, and our guide to when chicks can go outside covers the first outings and the permanent move. Do not rush it, because a half feathered chick cannot keep itself warm on a cold night.
FAQs
How to set up a brooder for baby chicks step by step.
Choose a large sturdy container, add 2 to 3 inches of pine shavings, set the heat source at one end only, add a chick feeder and a chick waterer, and preheat the whole setup 24 hours before the chicks arrive. Start at 95F in week 1 and drop 5F a week.
What temperature do baby chicks need.
Start at 95F in week 1 and drop 5F a week, to about 70F by week 6. Watch the chicks as well as the thermometer, because chicks piled under the heat are cold and chicks pressed against the far wall are too hot.
Heat lamp or heat plate for chicks, which is better.
A heat plate is safer and more natural, because it cannot set bedding on fire and it lets chicks follow a normal day and night rhythm. A heat lamp is cheaper and warms a bigger area, but it must be clamped and guarded, never hung by its cord alone.
How much space does each chick need in a brooder.
Half a square foot per chick in the first week, rising to 1 square foot by 4 weeks and 1 to 2 square feet by 6 to 8 weeks. Plan the bigger box before week 3, because chicks outgrow a small tub fast.
What bedding is safe for baby chicks.
Pine shavings, 2 to 3 inches deep. Never use newspaper, because the slick surface can cause splayed legs, and never use cedar shavings, because the aromatic oils irritate chick lungs.
Also see Can Chickens Eat Potatoes and Which Parts Are Unsafe
Keep Reading

Nusrat
Author, TheChickenPet.com